How to Install LUTs in Adobe Premiere Pro 2024

Installing LUTs in Adobe Premiere Pro is simple. Rather than searching for your LUT on your hard drive every time you want to use them, this method installs the LUTs permanently in the Lumetri color panel for easy access. Plus, you can now keep all of your LUTs inside one folder for both Premiere and Media Encoder to access, keeping your system organized and streamlined. And while you’re here, be sure to check out our collection of professional creative LUTs for filmmakers.
Step 1
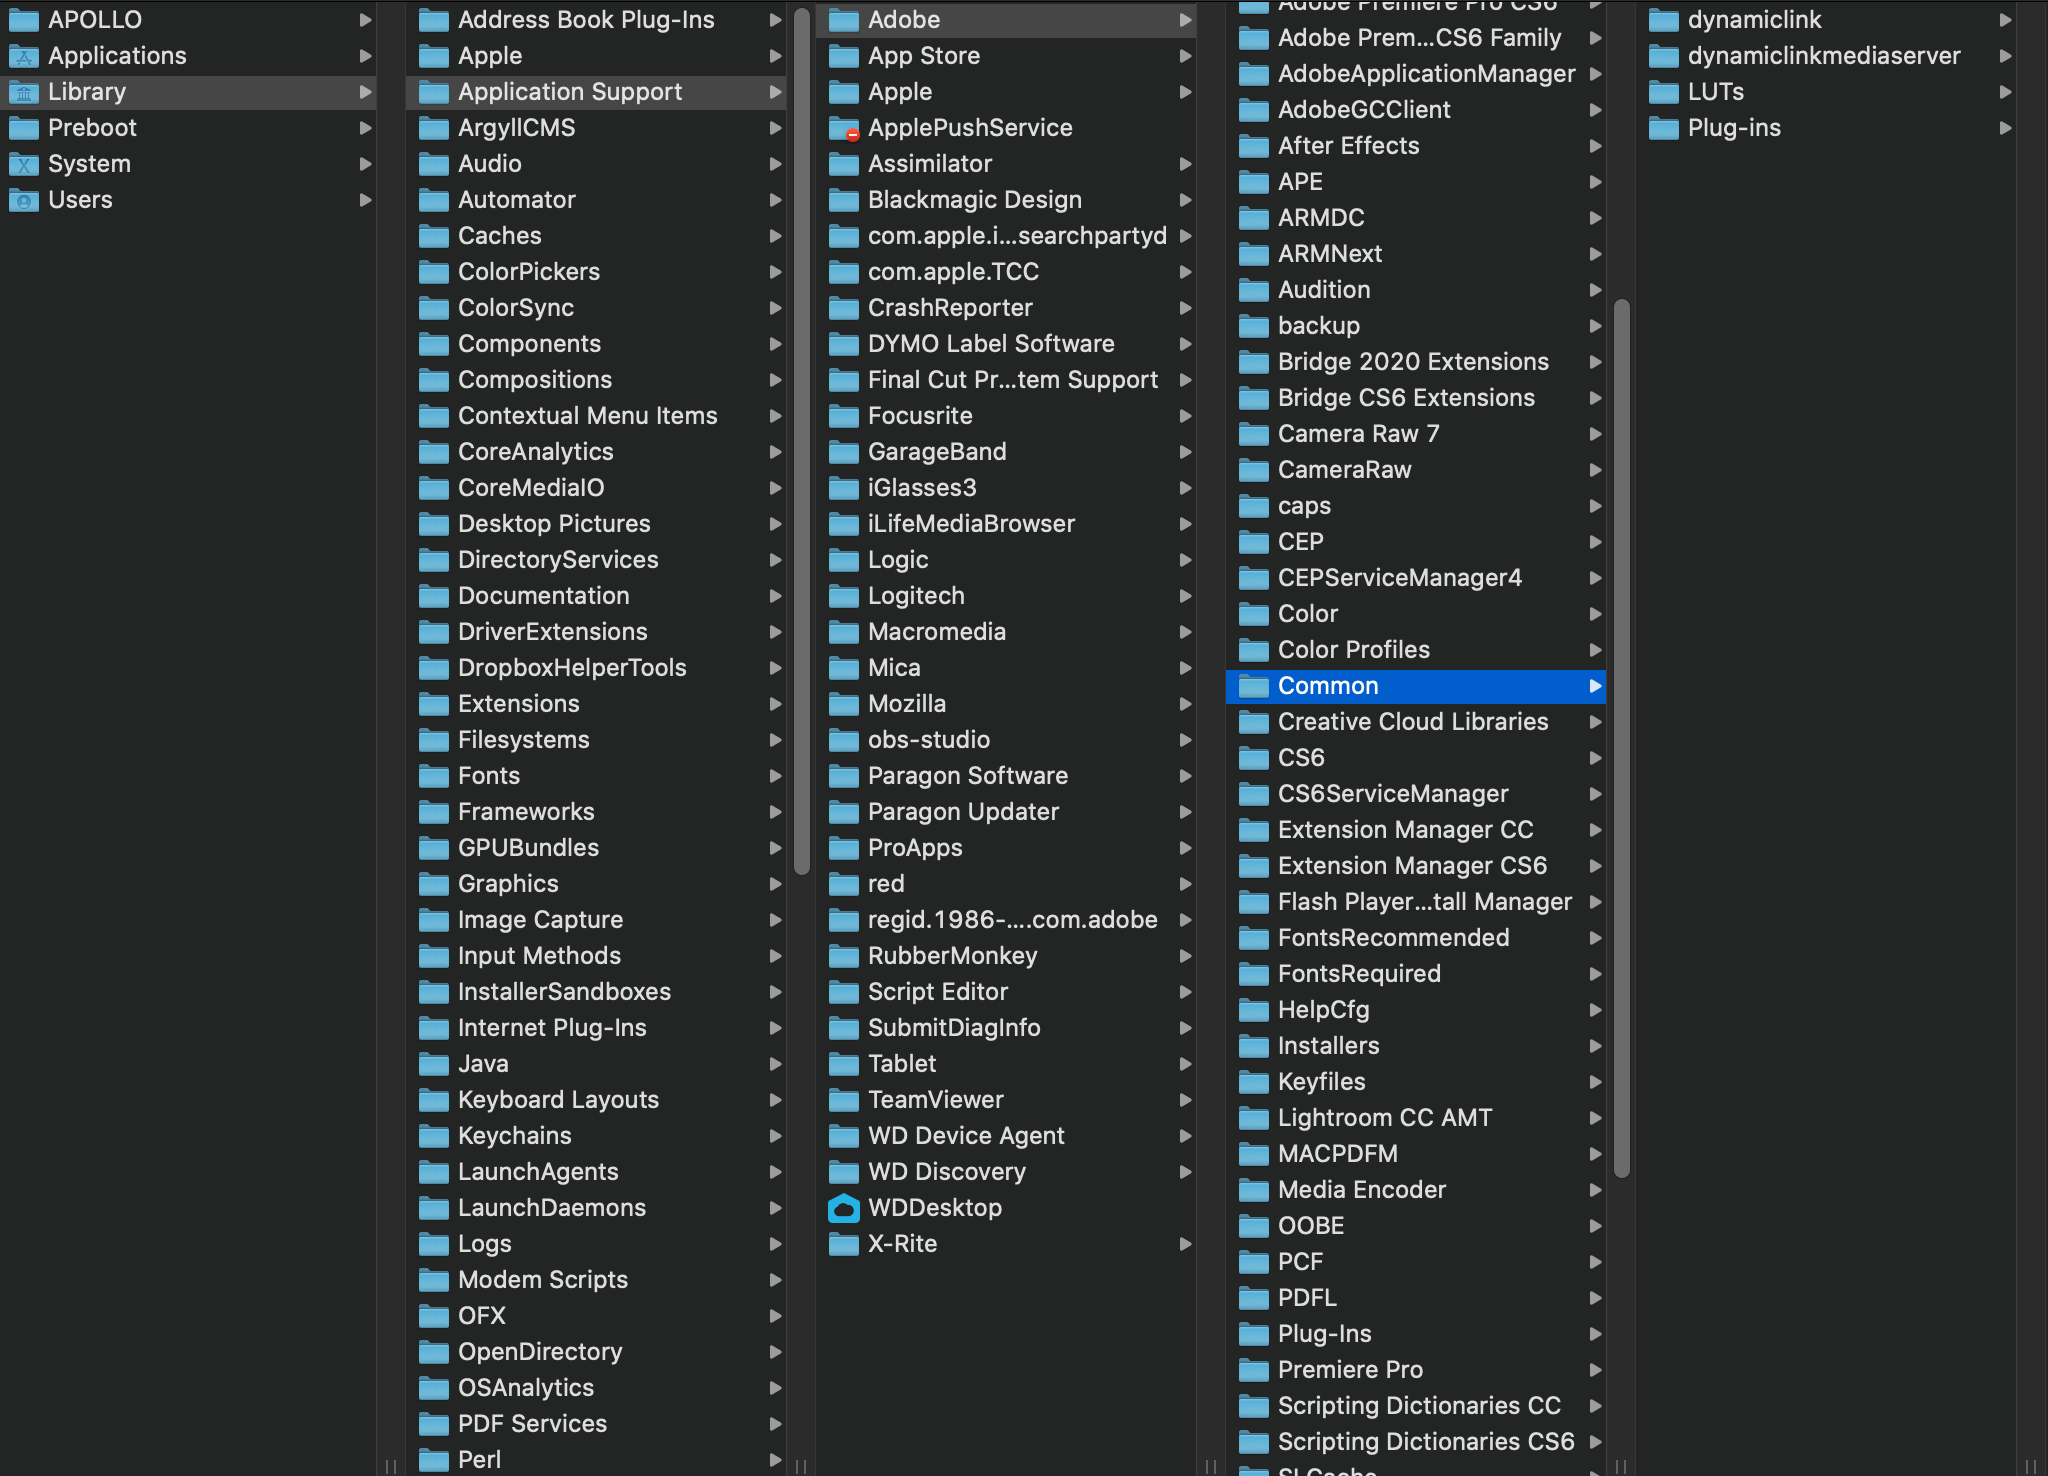
On a Mac, navigate to /Library/Application Support/Adobe/Common
On a PC, navigate to C:\Program Files\Adobe\Common
Step 2
Within “Common”, create a new folder called “LUTs”.
Within that folder, create two new folders called “Creative” and “Technical”.
Note: folder names are case-sensitive
Step 3
Copy the LUTs to the “Creative” folder. If you have any technical LUTs such as a Log to Rec.709 conversion, you can copy it to the “Technical” folder.
Step 4
Restart Adobe Premiere Pro. Your LUTs will be loaded into the Lumetri color panel for color grading.

And that’s it! Now whenever you need quick access to your LUTs, you don’t have to browse to their location every time you want to use them.
If you want a detailed walkthrough of everything covered in this post, plus how to color grade using LUTs, check out the video below.
A versatile LUT pack for videographers looking to achieve classic, cinematic colors on their footage.
A collection of popular color grading looks designed with versatility in mind. Organized into 4 categories based on unique tone curves, each LUT is fine-tuned to bring the best out of any footage by applying pleasing contrast, enhancing skin tones, and creating cinematic color contrast.
Variety
Looks ranging from rich and vibrant to cool and moody.
Subtle
Beautiful tones without sacrificing image quality.
Stress-Tested
Consistent and predictable colors with no surprises.
Pack contains
28 LUTs (33x33 .CUBE files)
Getting started PDF
Free updates for life
Compatibility
Works On
Desktop and mobile, Mac and PC
Editing Apps
Premiere Pro, DaVinci Resolve, FCP X, Filmora
Cameras
Any Camera
Preferred Color Profiles
Any standard profile including Rec.709, Neutral, Natural, Cine, Cinelike V2, Eterna, Standard, IPP2 Medium Medium, DJI HLG, DJI D-LogM.
If shooting in a Log profile, convert to Rec.709 first using a LUT or CST.

The perfect LUT pack for wedding videographers seeking to emulate the timelessness of film.
If you’ve been looking for a way to emulate the bright and airy look of true film, look no further. The cool greens, rich skin tones, beautiful pastels, and soft highlight roll off give these LUTs their distinct look. Simplify your workflow while applying a timeless look of luxury and nostalgia.
Film Emulation
The timeless look of true film applied in moments.
Skin Tones
Refined and pastel-like skin tones regardless of ethnicity.
Gentle
Works with footage from any camera and any part of the day.
PACK CONTAINS
5 LUTs (33x33 .CUBE files)
Getting started PDF
Free updates for life
COMPATIBILITY
Works On
Desktop and mobile, Mac and PC
Editing Apps
Premiere Pro, DaVinci Resolve, FCP X, Filmora
Cameras
Any Camera
Preferred Color Profiles
Any standard profile
For best results, use Rec.709, Neutral, Natural, Cine, Cinelike V2, Eterna, Standard, IPP2 Medium Medium, DJI HLG, DJI D-LogM.
If shooting in a Log profile, convert to Rec.709 first using a LUT or CST.